SURFACE FINISH OF PISTONS
Surface finish is a critical factor in the performance and longevity of engine pistons. As the primary component that converts combustion energy into mechanical motion, pistons operate under extreme conditions, including high temperatures, pressures, and friction. The surface finish of a piston directly influences its ability to retain oil for lubrication, form effective seals with the piston rings, minimize friction with the cylinder wall, and manage heat dissipation.
Surface finish of pistons is difficult to achieve due to their complex shapes, inaccessible geometries for tactile probes, varying material properties, and tight tolerances. Our non-contact optical profilometer (Keyence VR6000) allows us to three dimensionally capture these geometries and specify exactly where optimal measurements should be performed.

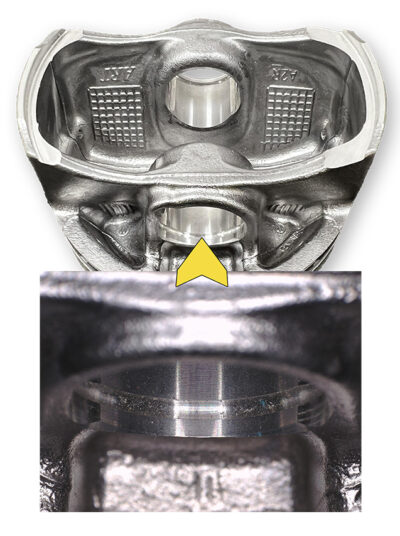
PIN BOSS GROOVE
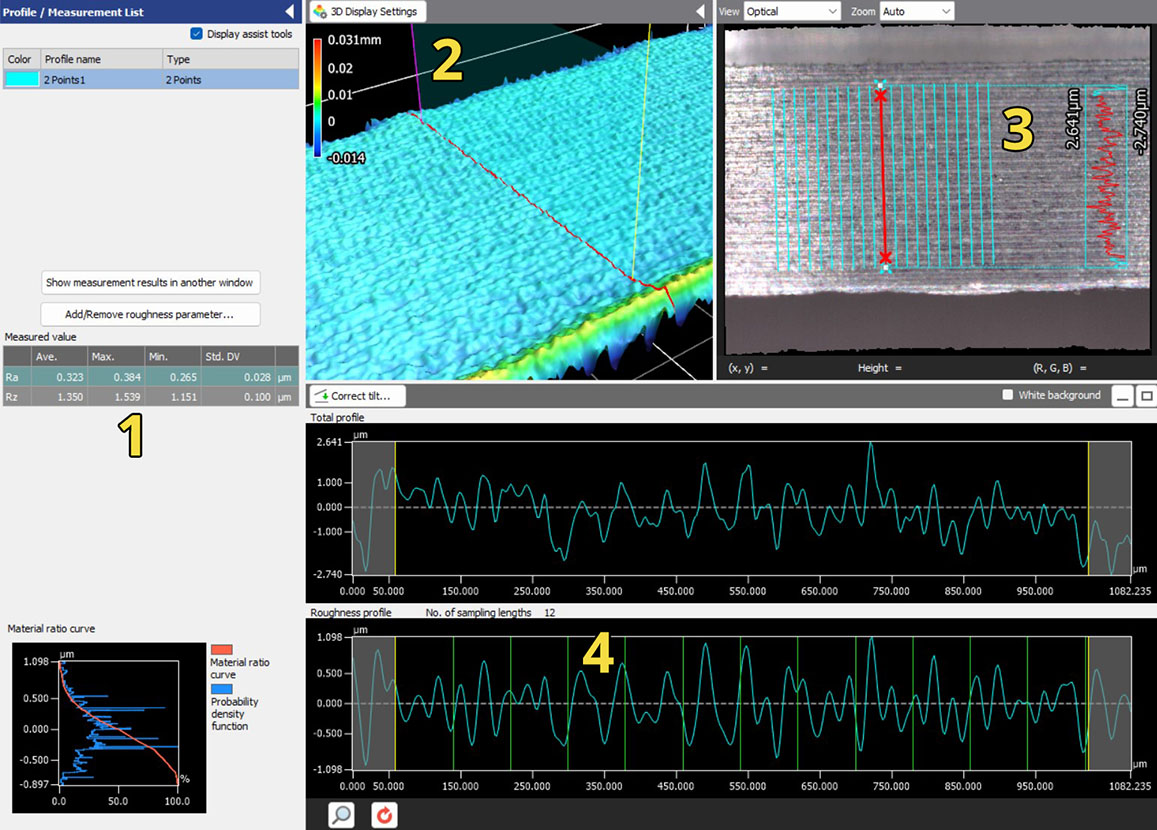
Due to the short run available for measurement, tactile profilometers may struggle to perform this measurement. By angling the piston a few degrees we can capture 30-40 degrees of the groove. Below are some descriptions of the measurements:
- Ra & Rz values
- 3D map of surface with deviation values
- Multi-line profilometer measurements across the groove
- Surface profile and roughness profiles, sampling lengths

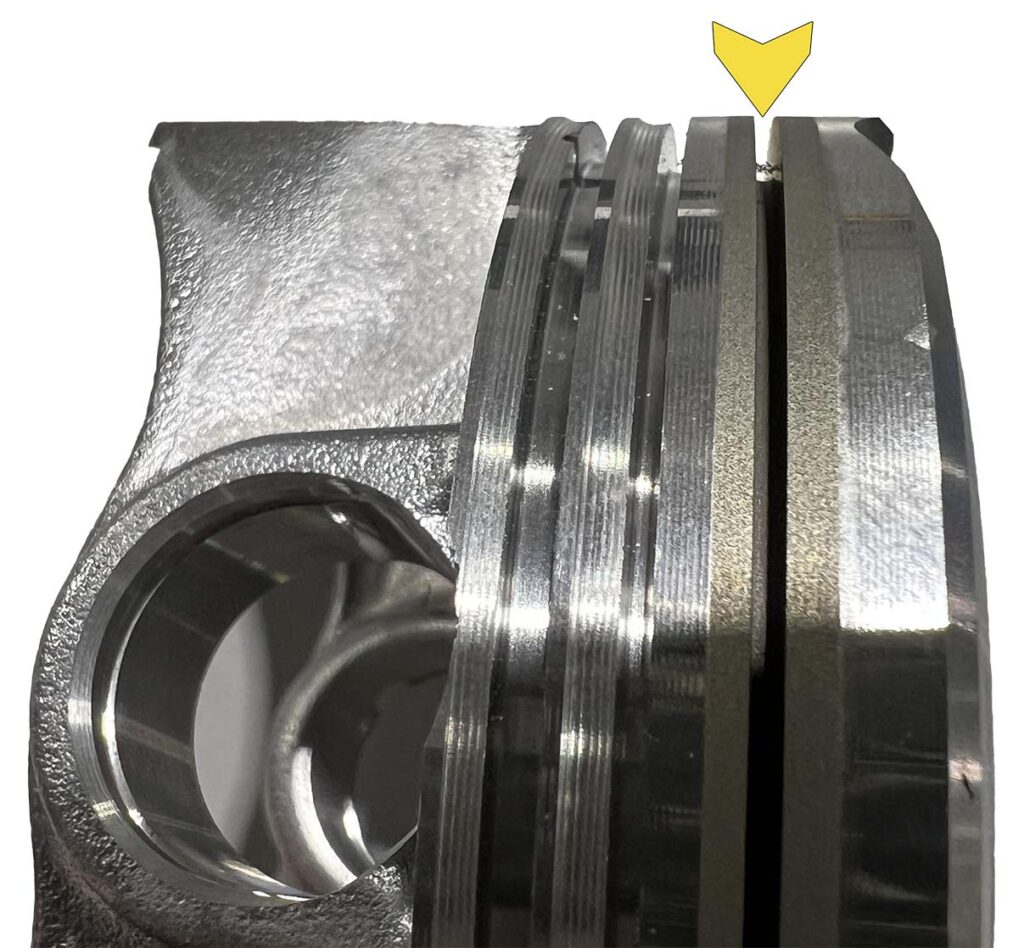
COMPRESSION RING GROOVES
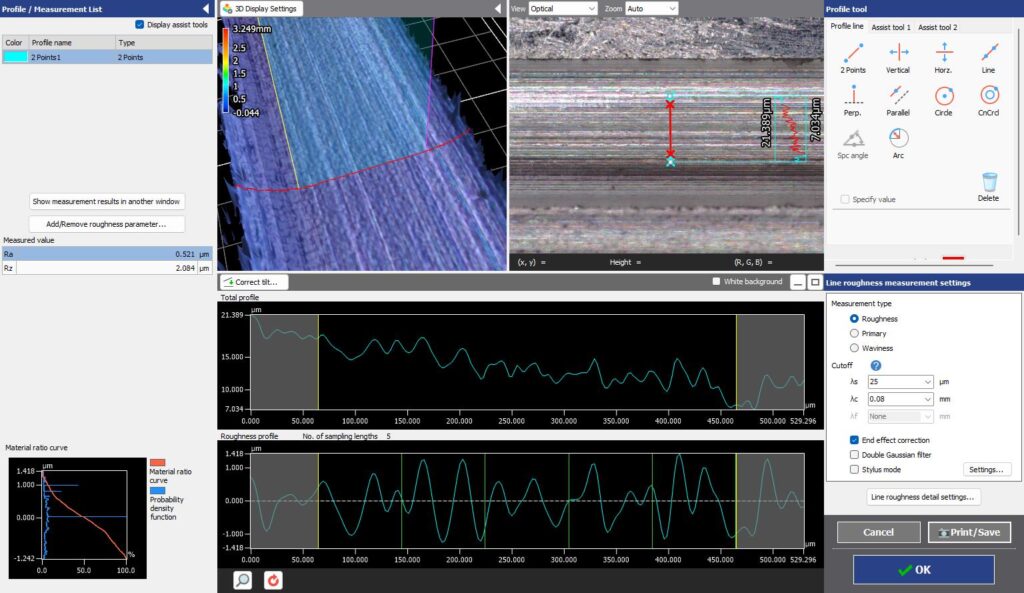
These narrow but deep grooves make inspection particularly difficult, if not impossible for tactile probes. A distinct advantage of non-contact optical profilometry is the fast acquisition, repeatable measurements, and robust visualization of the geometry.


