Dye Penetrant or CT Scanning?
There is a time and place for every type of inspection method, and there are multiple factors to consider when deciding which one is right for a given scenario. For example, are there any specific inspection requirements called out for by the manufacturer, customer, or on a part drawing? (e.g. the method, procedure, acceptance criteria, etc.) Can the object be shipped to a laboratory or does the inspection have to be performed on-site? What is the manufacturing method and the suspected defect condition? Is the flaw likely to be open to the surface or sub-surface? Understanding factors like these will narrow the options when it comes to choosing your method.
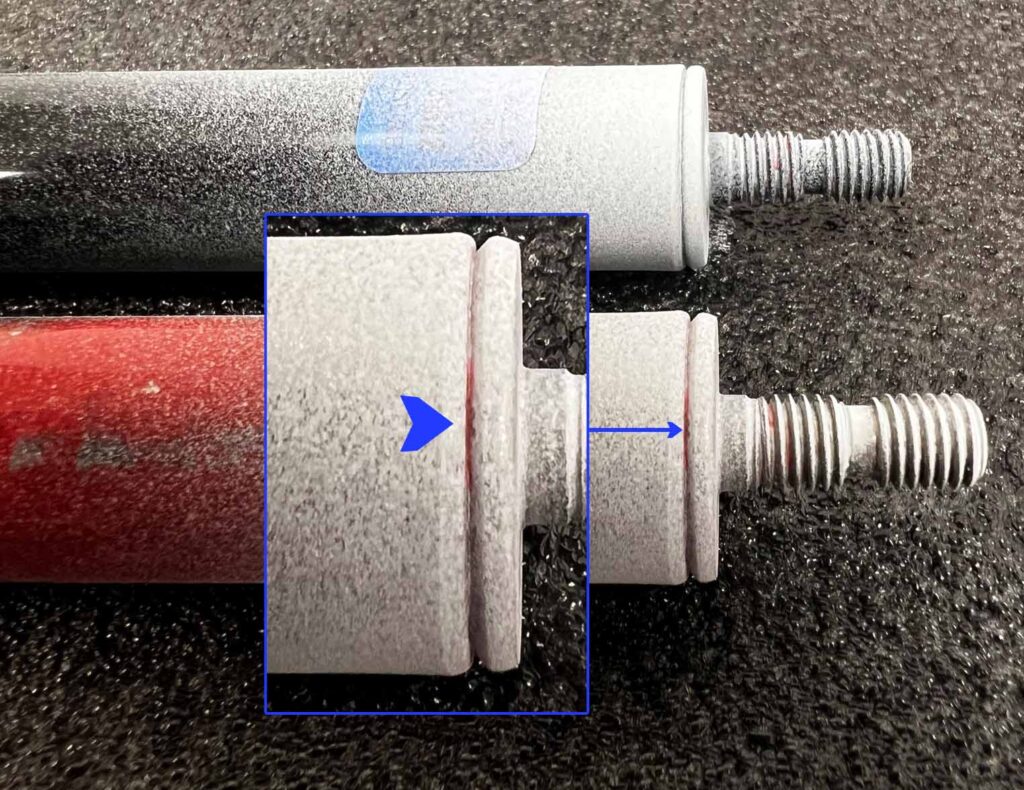
This case study compares the strengths and weaknesses of the surface method Liquid Dye Penetrant (PT) versus the subsurface method X-ray computed tomography (CT). The test sample is a failed strut cartridge that is leaking due to a bad weld.
Dye Penetrant of Strut Weld
It takes less than 30 minutes to perform a standard dye penetrant inspection. The basic steps are listed to the right.
Developer draws dye that’s been left behind in surface breaking defects like pores, cracks, or weld overlap. Dye is extremely sensitive and can reveal very fine defects unseen by just a visual inspection.
>Clean the sample
>>Apply and allow dye to dwell for 10 minutes
>>>Clean all dye from the surface
>>>>Spray the area of interest with Developer
When Dye Penetrant is applied to a surface it is pulled into cavities and crevices via capillary action. It remains in those crevices even after wiping the Penetrant off of the surface. Once Developer is applied, it draws the Penetrant out that was left behind in surface breaking defects like pores, cracks, or weld overlap. Dye is extremely sensitive and can reveal fine defects such as cracks that would go unnoticed with a regular visual inspection.
Dye Penetrant was successful in determining the location of a flaw in this part. However, this test method may not be the best solution for part geometry like this. The area of interest is very small and difficult to clean. For example, the lingering dye in the threads could lead to false indications and conclusions. Additionally, this method does not offer a way to characterize the flaw beyond “present” and may not provide conclusive answers about the part’s failure.
CT Scan of Strut Weld
There are several additional methods that could be used for this flaw detection, but CT scanning is certainly the most beneficial for flaw characterization.
CT scanning has its own limitations like cost, being stationary in a lab, and requiring adequate penetration through the sample. Some large or heavy parts may not even fit into a CT system.
>Stage the sample
>>Set parameters and scan the part
>>>Process the data into a 3D representation
>>>>Evaluate the scan data for indications and defects
When conditions are right CT scanning offers unparalleled access to internal geometry, allowing the technician the ability to fully characterize part geometry and flaws. Flaws can not only be located but evaluated for point of origin, length, and severity. Additionally, the data is conclusive. Unlike with dye penetrant showing the existence of a flaw, CT slice data confirms a transverse crack at the weld.
